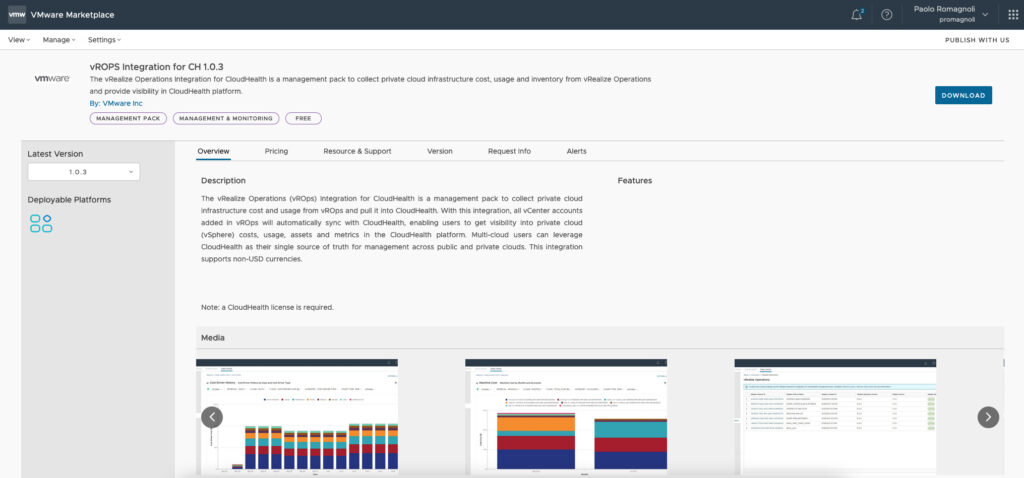
The vRealize Operations (vROps) Integration for CloudHealth is a Management Pack to collect private cloud infrastructure (vSphere) cost and usage from vROps and push it into CloudHealth. With this integration, all vCenter accounts added in vROps will automatically sync with CloudHealth, enabling users to get visibility into private cloud (vSphere) costs, usage, assets and metrics in the CloudHealth platform. The CloudHealth platform consolidates your multi-cloud data on a single pane of glass, providing visibility into your vSphere based private cloud, VMware Cloud on AWS hybrid cloud and the public cloud (AWS, Azure, Google Cloud and Oracle Cloud).
Requirements
This post refers to the vROPS Integration for CH version1.0.3. You need to have access to a CloudHealth tenant either as a trial or a paid subscription and a vROps instance either on-premise or SaaS (aka vROps Cloud). If you wish to integrate vROps on-premise instance you need to ensure the followings:
- the vROps version is 8.2 and above
- the vROps node / Collector that will run the Management Packs need to access internet (optionally trough proxy)
- the FIPS mode is disabled in vROPs
You need a user with Administrator rights in vROps and a user with Power User or Administrator rights in CloudHealth.
Install vRealize Operations Integration for CloudHealth
Like any other Management Pack, the vRealize Operations Integration for CloudHealth consists of a PAK file. Download it from the VMware Marketpalce and save it to a local temp folder on your workstation.
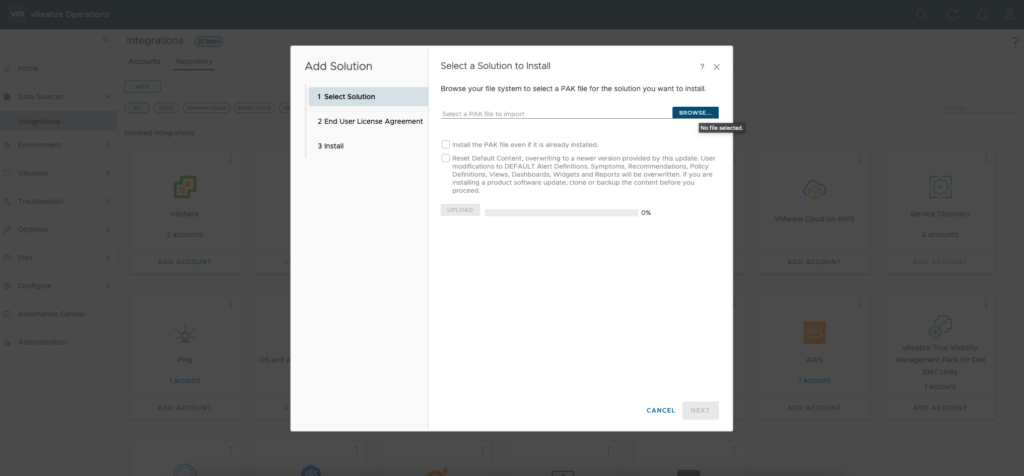
Log in to the vROps user interface with administrator privileges. In the left tree menu select Data Sources > Integrations and select the Repository tab. Click on the ADD button.
In the Add Solution form click BROWSE, here select the PAK file you just downloaded. Read and accept the Install the PAK file even if it is already installed checkbox, and click UPLOAD.
The upload took several minutes in my case. Installation details appear with a success message The PAK file signature is valid.
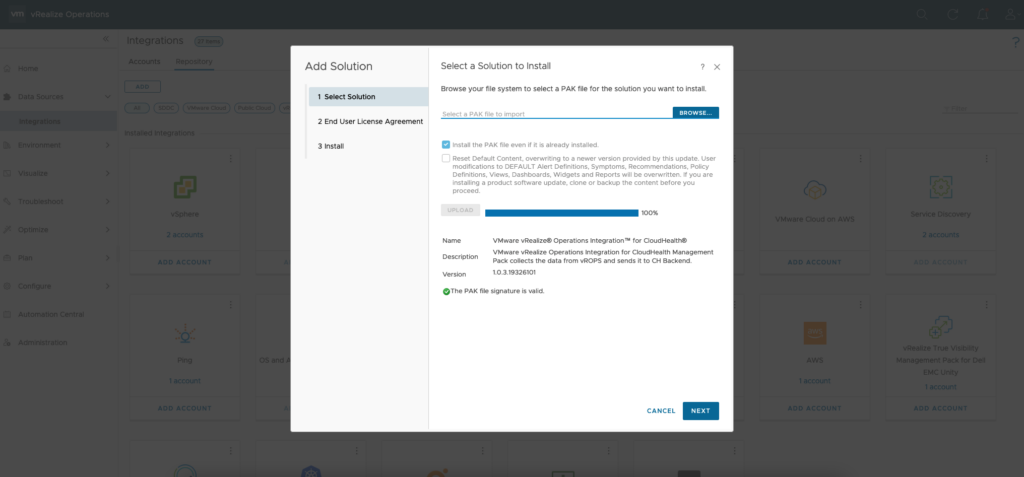
Once the upload is completed click NEXT, read and accept the EULA and click NEXT and this will start the solution installation. One the installation is completed click FINISH.

The installation is completed and you can now proceed with the configuration.
Get CloudHealth API Key
You need an API Key in order to make authenticated requests to the CloudHealth API service. Get your API Key using the following steps.
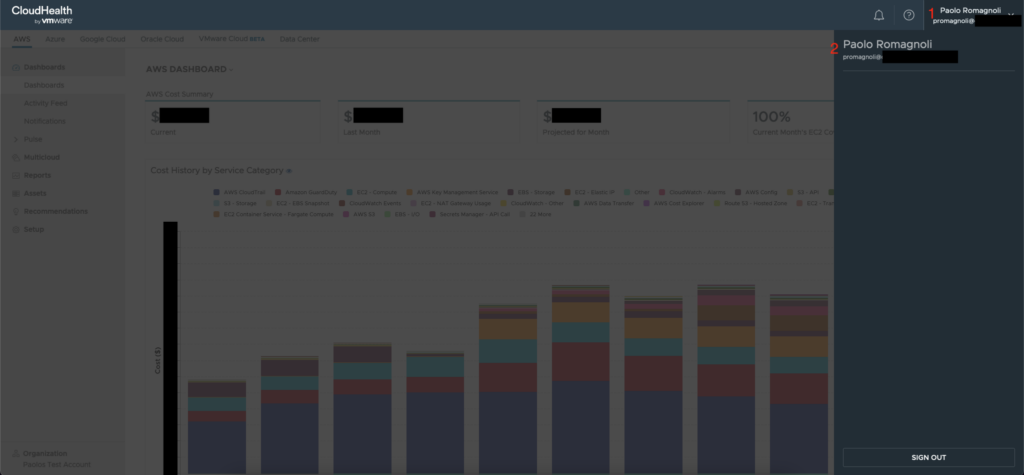
Login in the CloudHealth platform, click your profile name at the top right corner (1 in the picture below). This opens a dark section on the right part of the user interface, here click on on your name (2 in the picture below) in order to access your profile settings.
In your profile settings, scroll to the SETTINGS section and click GENERATE NEW API KEY. Copy the newly generated unique API key. Finally click on SAVE PROFILE CHANGES.

Configure vRealize Operations Integration for CloudHealth
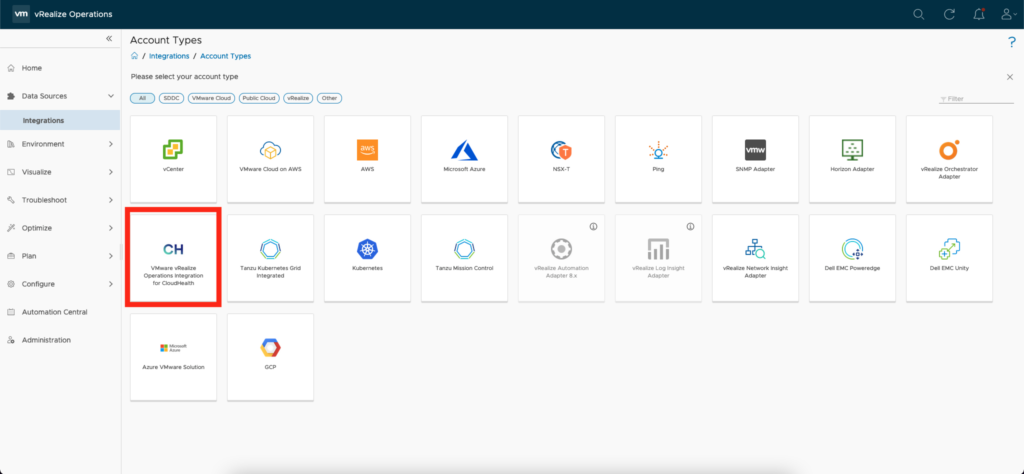
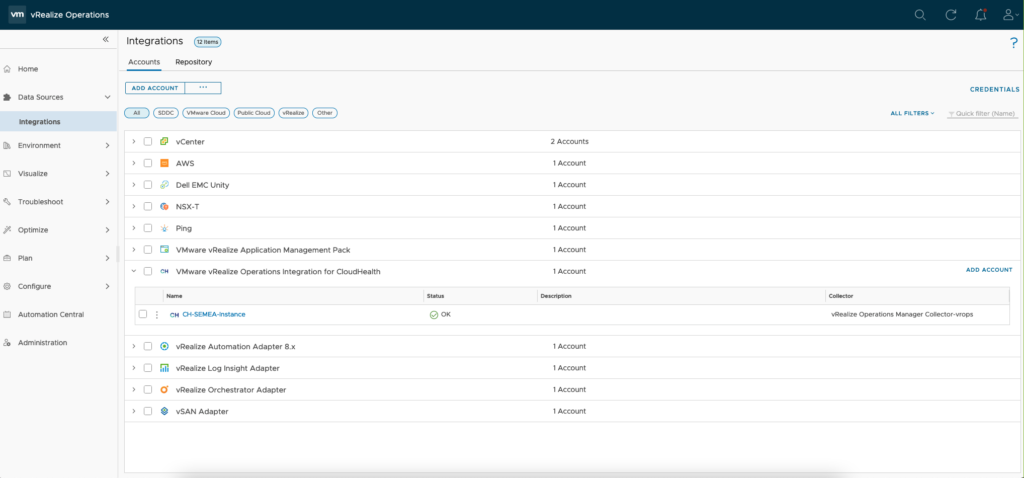
Log in to the vROps user interface with administrator privileges. In the left tree menu select Data Sources > Integrations and click ADD ACCOUNT. Here select VMware vRealize Operations Integration for CloudHealth tile.
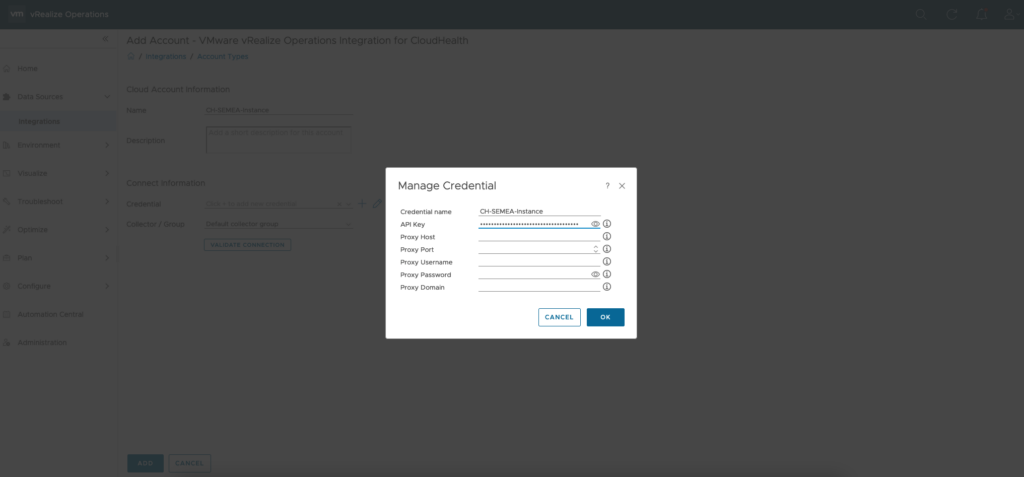
Start configure the Management Pack instance by providing a name (this can be any convenient name for you) and adding an optional description. Then add a credential by clicking on the plus sign. In the Manage Credential form provide a name for your credential and copy the API Key in the related field. Optionally provide the HTTP/s proxy details that are specific for your environment. In my lab there is no proxy, so I can leave all other fields empty. Click OK to save the new Credential.
Complete the configuration by selecting the collector upon which you want to run the adapter instance. A collector gathers objects into its inventory for monitoring. The collector specified by default is selected for optimal data collecting.
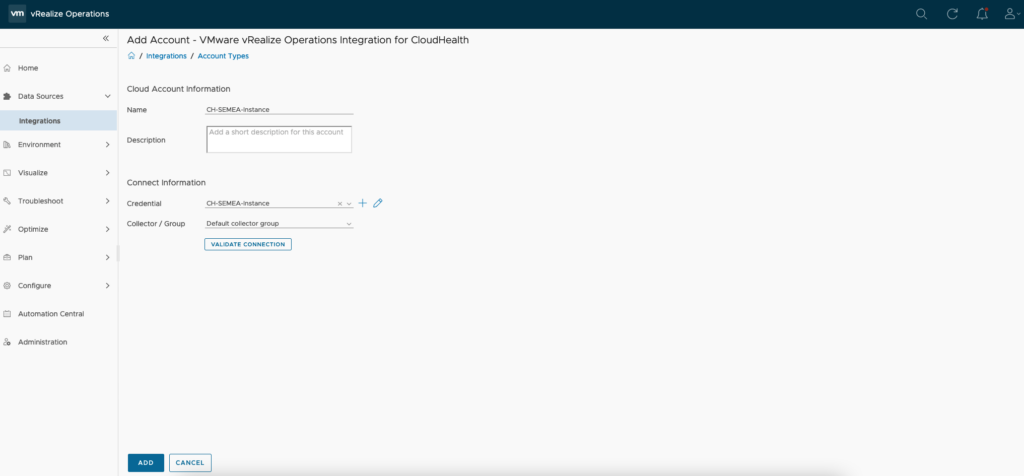
Click VALIDATE COLLECTION to check if everything is fine in your setup and configuration.
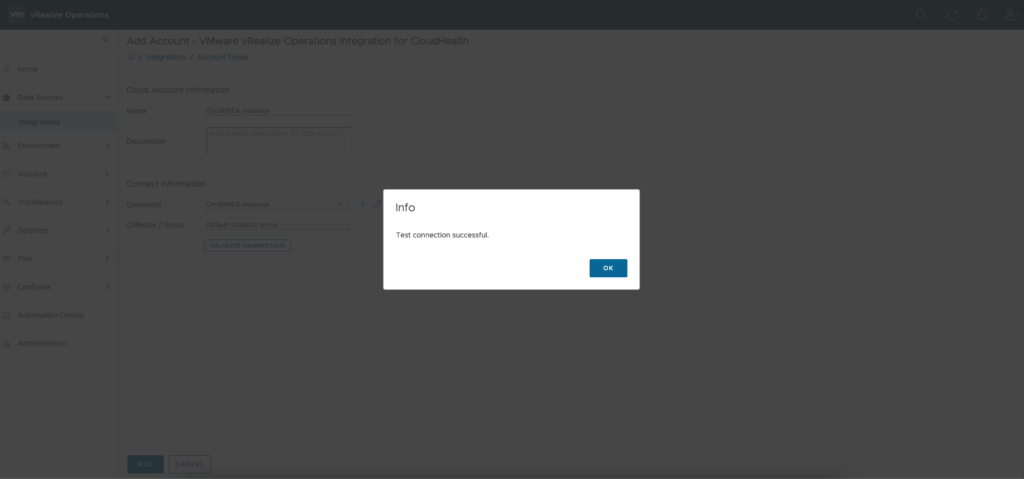
Once you successfully test connection click ADD.
Allow one or two collections cycle (if you are using defaults this means 5 or 10 minutes) before checking the newly configured instance collection status. To do so go to Data Sources > Integrations, in the Accounts tab expand the VMware vRealize Operations Integration for CloudHealth line.
Check data is pushed into CloudHealth
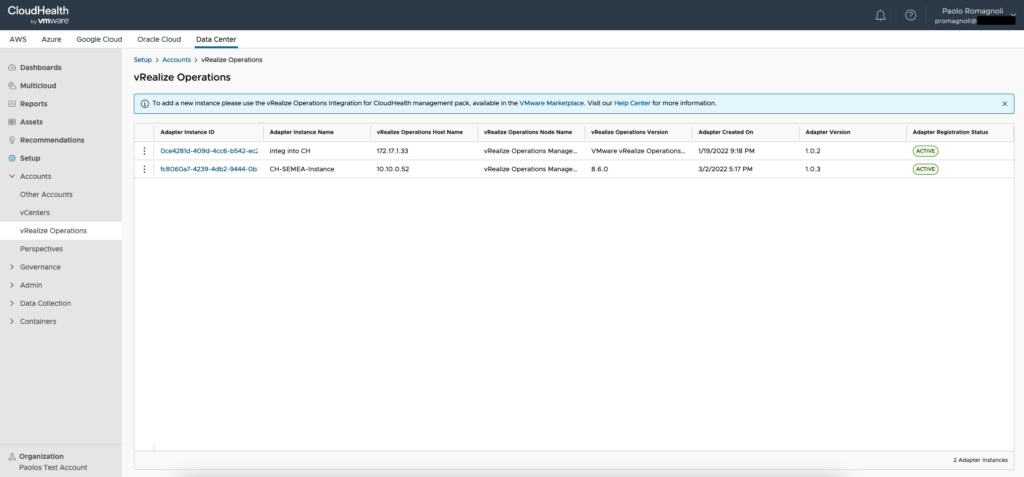
Login in the CloudHealth platform and select the Data Center tab. In the left tree menu select Setup > Accounts > vRealize Operations. Here you will see your vROPs instance and you can check the registration status (should be ACTIVE). In the picture below you can see I have configured two different instances, this means I went trough the procedure described in this post two times for two different vROPs instances.
The CloudHealth reports and dashboard will display data from the vROps instance(s) you configured and you can take advantage of all the IT Fanancial Management capabilities of this platform.
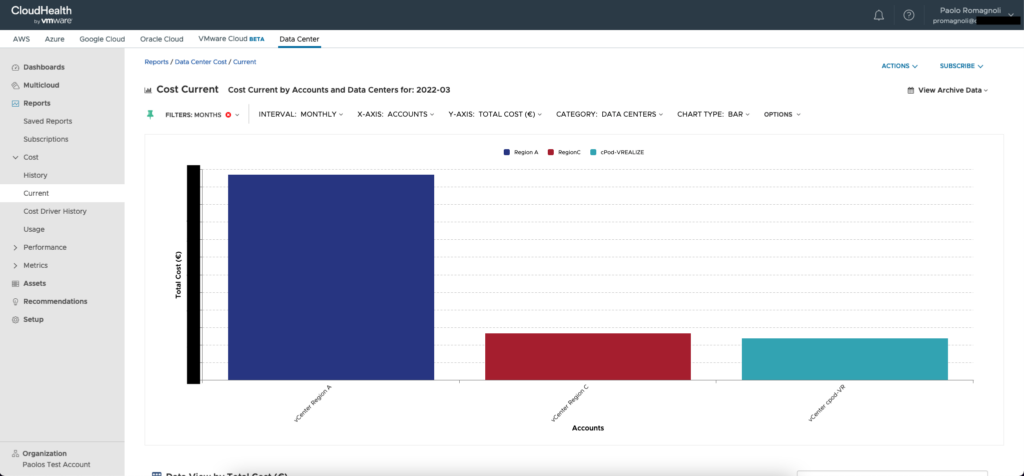
Now you can control and optimize your IT costs for private, hybrid and public cloud from a single console!